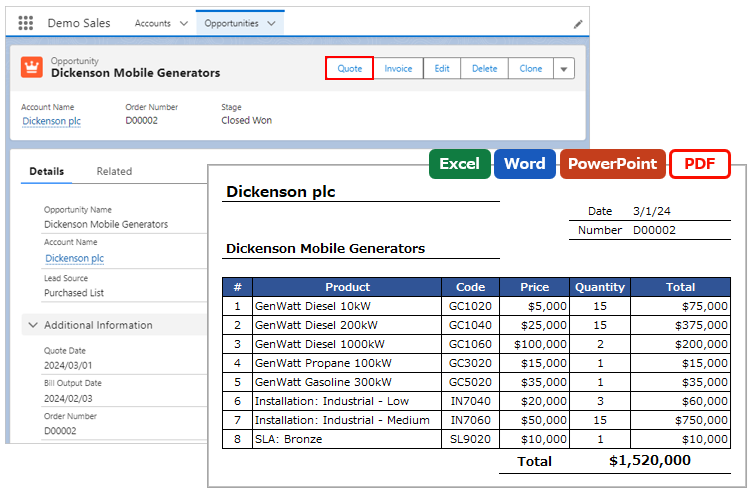
Office File Creator can batch output or save files from the list view. This procedure describes the settings for batch output by Visualforce pages.
*The flow also allows batch file output from the ListView. For more information on flows, refer to Use with Screen Flow.
Create Visualforce page
From Settings, select Custom Code > Visualforce pages, click the "New" button on the Visualforce screen, and paste the following code.
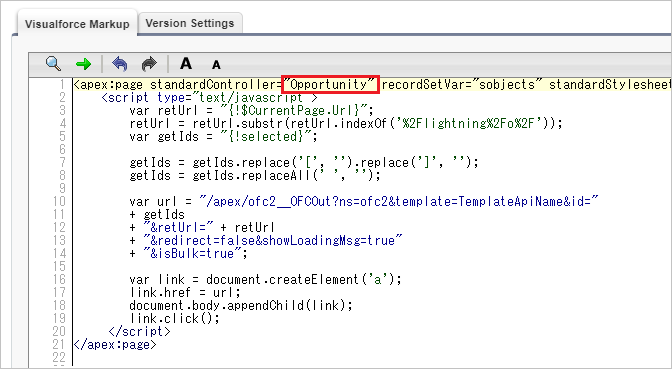
<apex:page standardController="Opportunity" recordSetVar="sobjects" standardStylesheets="false" sidebar="false">
<script type="text/javascript">
var retUrl = "{!$CurrentPage.Url}";
retUrl = retUrl.substr(retUrl.indexOf('%2Flightning%2Fo%2F'));
var getIds = "{!selected}";
getIds = getIds.replace('[', '').replace(']', '');
getIds = getIds.replaceAll(' ', '');
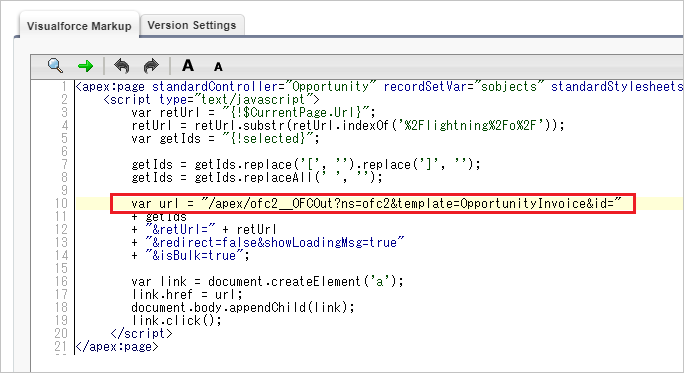
var url = "/apex/ofc2__OFCOut?ns=ofc2&template=TemplateApiName&id="
+ getIds
+ "&retUrl=" + retUrl
+ "&redirect=false&showLoadingMsg=true"
+ "&isBulk=true";
var link = document.createElement('a');
link.href = url;
document.body.appendChild(link);
link.click();
</script>
</apex:page>Replace "Opportunity" in the first line "standardController="Opportunity"" with the name of the object API to be output.
Then, copy the Custom Button URL (Download) in the OFC template record from the beginning to "&id=".
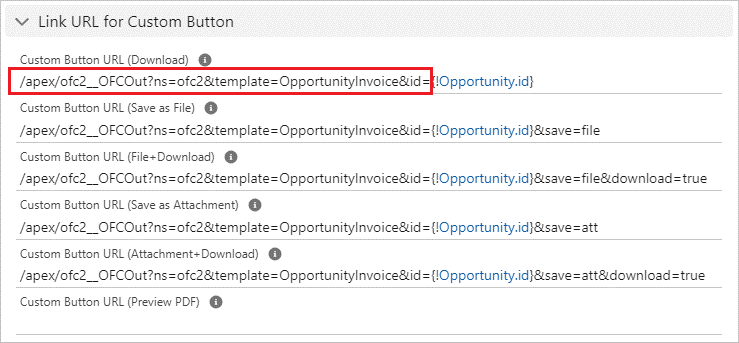
Paste after "var url=" on line 10.
To save to a file or attachment instead of outputting to a file, add "+"&save=file" or "+"&save=att" to the next line of line 12.
+ "&retUrl=" + retUrl
+ "&save=file"
+ "&redirect=false&showLoadingMsg=true"
+ "&isBulk=true";
Save the Visualforce page under any name.
List of URL parameters (* is required)
| Parameters | Contents | Default |
| id * | Set the record Id. If there are multiple record Id's, set the record Id's connected by comma separators. |
Blank |
| template * | Set template API name. | Blank |
| save | Blank・・・Output to file file・・・Save to file att・・・Save as attachment |
Blank |
| download | If "file" or "att" is set to the "save" parameter, set "true" to download the file in addition to saving the file.
true・・・Save file + download false・・・Do not download |
false |
| rerUrl | Set the URL to redirect to after execution is complete. | The URL of the record detail page of the record Id, or the URL of the record detail page of the first record Id if there are multiple record Id's. |
| redirect | true・・・Redirect false・・・Do not redirect |
true |
| showLoadingMsg | true・・・Display the number of items on the running screen during execution false・・・Do not display the number of items on the screen during execution |
false |
| isBulk | true・・・Display completion message false・・・Do not display completion message |
false |
*download and isBulk have been added since Ver.2.
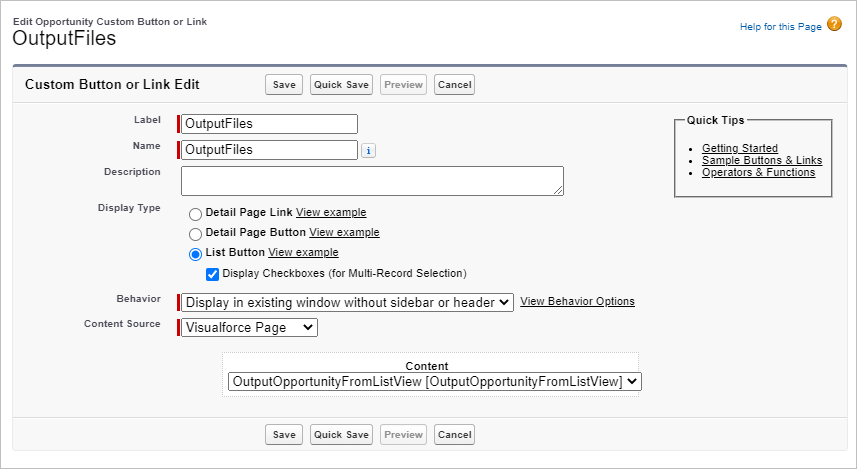
Create Custom Button
From the Object Manager, click on the "New Button or Link" button under Target Object > "Buttons, Links, and Actions" and save the file with the following information.
Label: any name (the name of the button as it appears in the ListView)
Name: any name
Display Type: List Button *Check on "Display Checkboxes (for Multi-Record Selection)"
Behavior: Display in existing window without sidebar and header
Content Source: Visualforce page
Content: Visualforce page created in the previous step
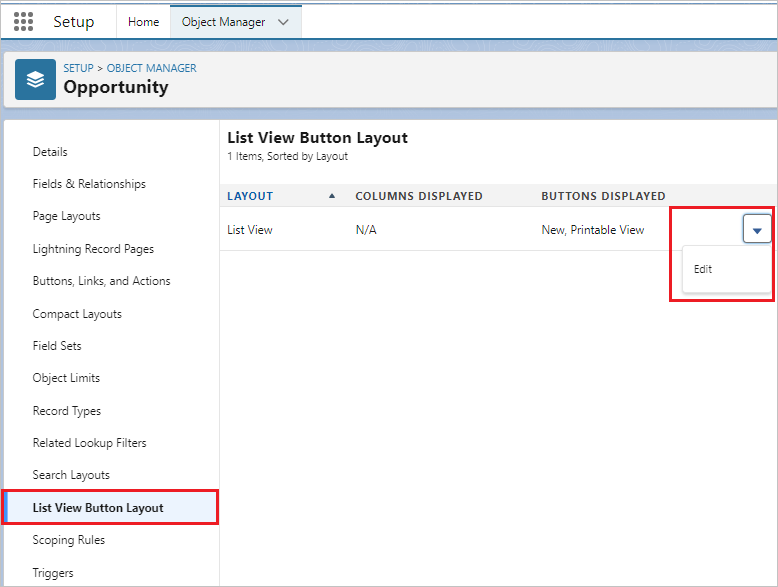
Click "List View Button Layout" in the left sidebar, then click "Edit" on the list view.
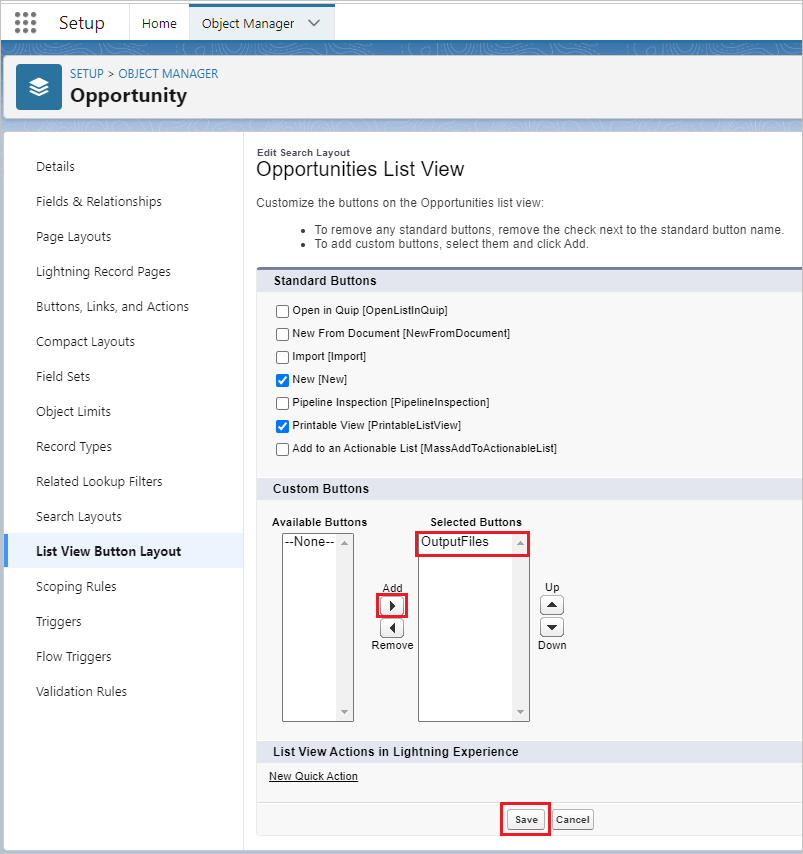
Add the created button from "Available Buttons" to "Selected Buttons" and click the "Save" button.
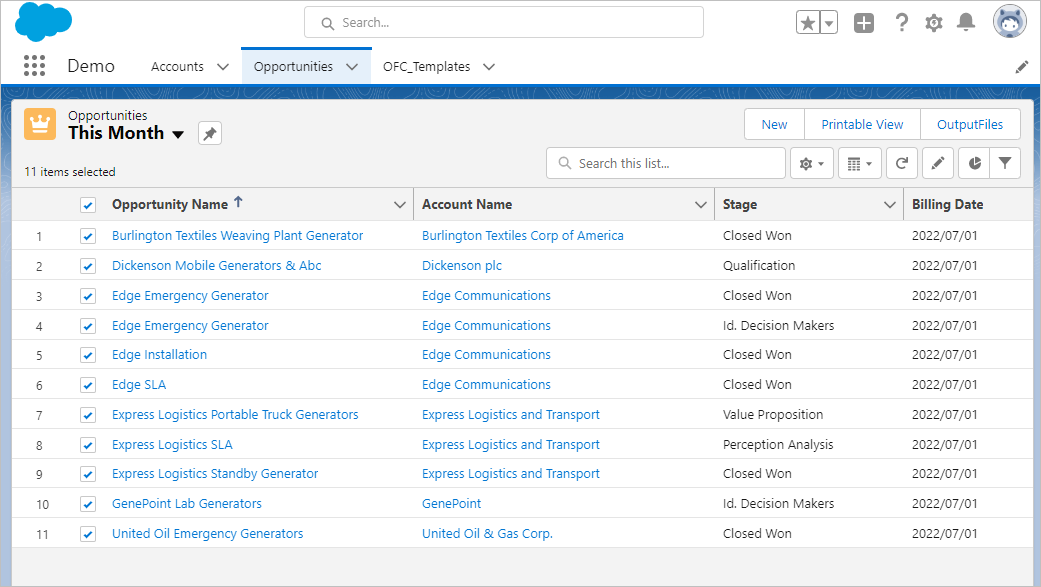
Clicking a button in the ListView will output or save files with the selected records.
Note
- Grant access to the Visualforce page you created to the profile of the user who will be using it.
- When executing the batch download, please make sure that all files have been downloaded. A completion message will appear before all files are downloaded, and the actual download may have a time lag.