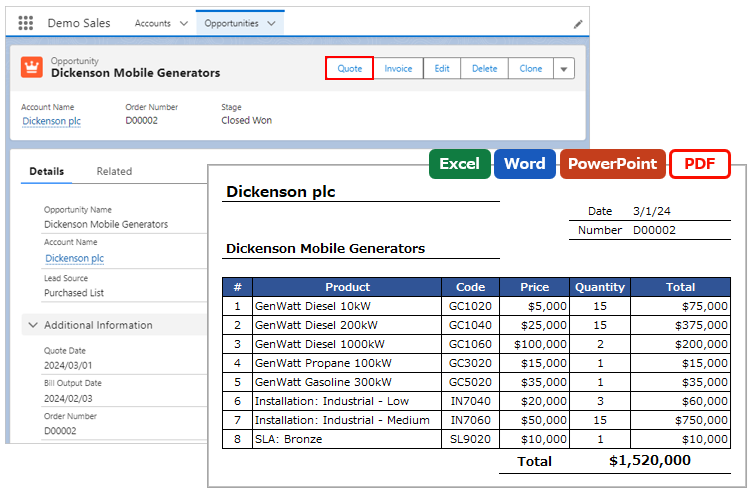
Office File Creatorは、リストビューから一括ファイル出力または保存することができます。本手順では、Visualforceページよる一括出力の設定を記します。
*フローでもリストビューより一括ファイル出力が可能です。フローについては、画面フローで使用を参照してください。
Visualforceページ作成
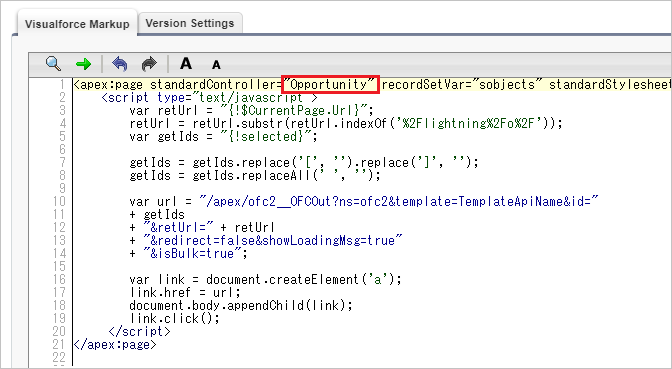
設定より、カスタムコード>Visualforceページを選択します。Visualforce画面で「新規」ボタンをクリックし、以下のコードを貼り付けます。
<apex:page standardController="Opportunity" recordSetVar="sobjects" standardStylesheets="false" sidebar="false">
<script type="text/javascript">
var retUrl = "{!$CurrentPage.Url}";
retUrl = retUrl.substr(retUrl.indexOf('%2Flightning%2Fo%2F'));
var getIds = "{!selected}";
getIds = getIds.replace('[', '').replace(']', '');
getIds = getIds.replaceAll(' ', '');
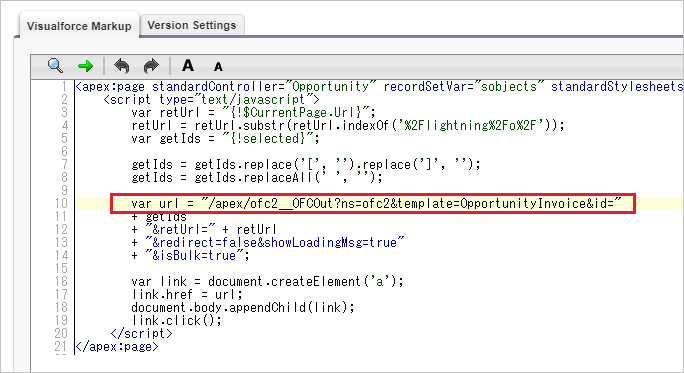
var url = "/apex/ofc2__OFCOut?ns=ofc2&template=TemplateApiName&id="
+ getIds
+ "&retUrl=" + retUrl
+ "&redirect=false&showLoadingMsg=true"
+ "&isBulk=true";
var link = document.createElement('a');
link.href = url;
document.body.appendChild(link);
link.click();
</script>
</apex:page>先頭行の「standardController="Opportunity"」のOpportunityを出力対象のオブジェクトAPI名に置き換えます。
続いて、OFCテンプレートレコードのカスタムボタンURL(ダウンロード)の先頭から「&id=」までをコピーします。
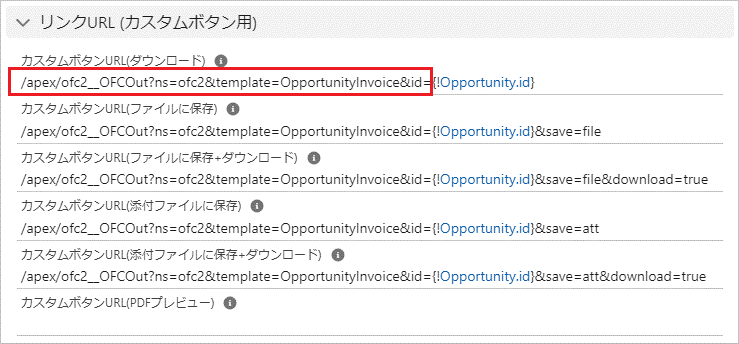
10行目の「var url=」の後ろに貼り付けます。
ファイルに出力ではなく、ファイル保存や添付ファイルに保存する場合は、12行目の次の行に「+"&save=file"」または、「+"&save=att"」を追記します。
例:
+ "&retUrl=" + retUrl
+ "&save=file"
+ "&redirect=false&showLoadingMsg=true"
+ "&isBulk=true";
Visualforceページを任意の名前で保存します。
URLパラメータ一覧 (*は必須)
| パラメータ | 説明 | デフォルト |
| id * | レコードIdを設定。 複数の場合は、カンマ区切りでつなげたレコードIdを設定。 |
空欄 |
| template * | テンプレートAPI名を設定。 | 空欄 |
| save | 空欄・・・ファイルに出力 file・・・ファイルに保存 att・・・添付に保存 |
空欄 |
| download | saveパラメータに"file"または"att"を設定した場合、ファイル保存に加えダウンロードする場合はtrueをセットします。
true・・・ファイル保存+ダウンロード |
false |
| rerUrl | 実行完了後にリダイレクトするURLを設定。 | レコードIdのレコード詳細ページURL。複数の場合は、先頭のレコードIdのレコード詳細ページURL。 |
| redirect | true・・・リダイレクトする false・・・リダイレクトしない |
true |
| showLoadingMsg | true・・・実行中の画面に件数を表示する false・・・実行中の画面に件数を表示しない |
false |
| isBulk | true・・・完了メッセージを表示する false・・・完了メッセージを表示しない |
false |
※download、isBulkはVer.2より追加されました。
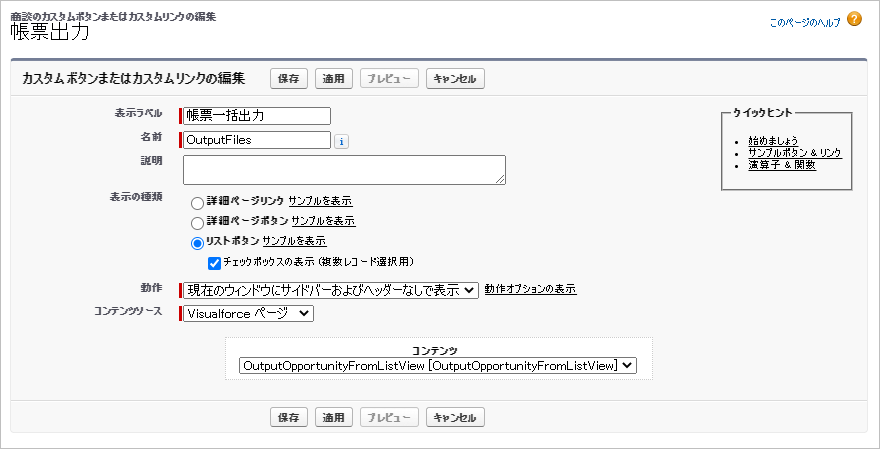
カスタムボタン作成
オブジェクトマネージャーより、対象オブジェクト>「ボタン、リンク、およびアクション」より「新規ボタンまたはリンク」ボタンをクリックし、以下の内容で保存します。
表示ラベル: 任意の名前(リストビューに表示されるボタン名)
名前: 任意の名前
表示の種類: リストボタン ※チェックボックスの表示(複数レコード選択用)にチェックオン
動作: 現在のウィンドウにサイドバーおよびヘッダーなしで表示
コンテンツソース: Visualforceページ
コンテンツ: 前手順で作成したVisualforceページ
左サイドバーの「リストビューボタンレイアウト」をクリックし、リストビューの「編集」をクリックします。
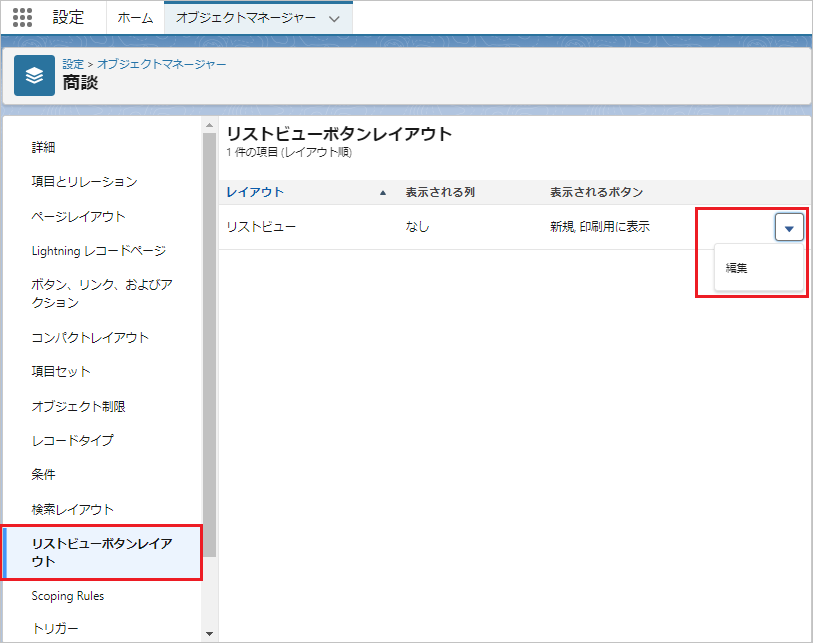
作成したボタンを「利用可能なボタン」から「選択したボタン」に追加し、保存ボタンをクリックします。

リストビューよりボタンクリックで、選択したレコードのファイルが出力または保存されます。

備考
- 使用するユーザーのプロファイルに、作成したVisualforceページへのアクセス権を付与してください。
- 一括ダウンロード実行時、すべてのファイルがダウンロードされたことを確認してください。すべてのファイルのダウンロード前に完了メッセージが表示され、実際のダウンロードはタイムラグが生じる場合があります。