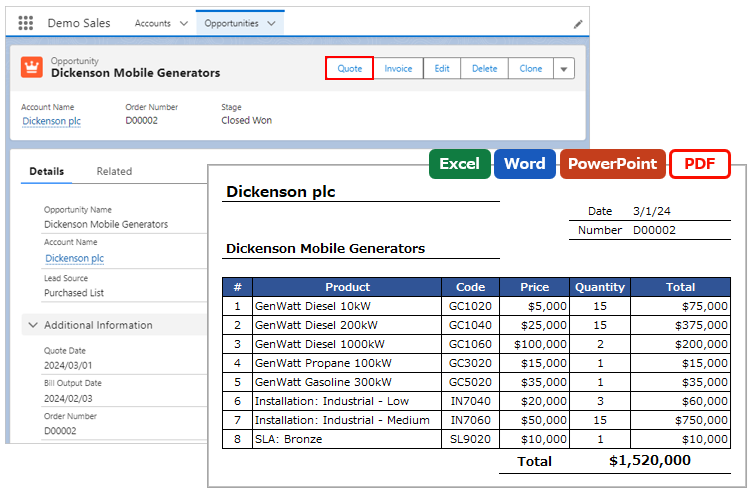
Create a Word(.docx) template file when outputting PDF files.
*Please check the Template Common Settings before referring to this page.
Formatting of Merge fields
For formatting Date, Date/Time, Currency, and Numeric fields, refer to below.
Formatting of Date and Date/Time Fields
Formatting of Currency and Number Fields
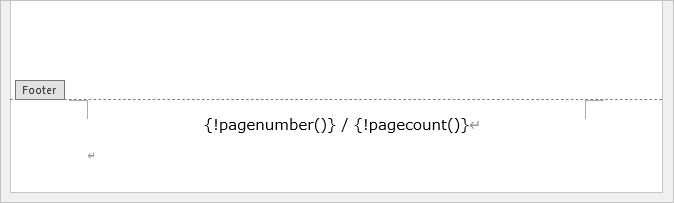
Page Number/Page Count
Use the following merge fields in the footer or header for page numbers and total number of pages. Word field codes are not supported.
Page Number・・・{!pagenumber()}
Page Count・・・{!pagecount()}
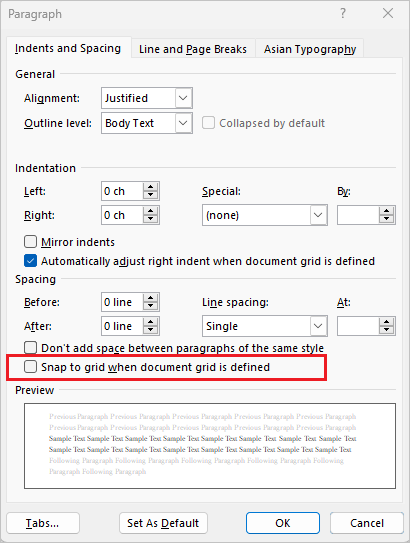
Line Spacing
Uncheck "Snap to grid when document grid is defined" in the Word template file. When checked, the line spacing is quite wide in the output. When unchecked, the PDF output will be slightly narrower than the line spacing in the Word template.
- Select all existing contents in the template with "Ctrl+A" and uncheck from the paragraph.
- Uncheck from the paragraph of the used style, such as standard style.
Margin
- If the extra page is output, reduce the top and bottom margins from the template's page setup.
- If the extra page is output, provide extra margin and room between the last line of text and the first line of the footer.
Tables
Borders
- If extra borders are output, set the color of the corresponding borders to white. In the application, HTML is converted to PDF using the PDF generation function of Visualforce in Salesforce, and although it is displayed correctly on HTML, it may not be as expected when converted to PDF in Visualforce. This is due to the specification of Visualforce, so it cannot be supported.
- If table borders are not output, set the borders again from the Table Properties. On the Word template, the borders of adjacent cells are displayed and the borders of the target cell may not be set.
Row Height
If the row height of the table is not output correctly, specify the row height from the Table Properties.
Position of text in cell
When setting the vertical position of text in a cell, set the Table Properties and Paragraph.
Align text in cells to the center (vertical)
- From Table Properties > Cells tab, set vertical alignment to "Center"
- From Paragraph > Indents and Spacing tab, set the Line spacing to "Single"
Align text in cells to the bottom
- From Table Properties > Cells tab, set the Vertical alignment to "Bottom"
- From Paragraph > Indents and Spacing tab, set the Line spacing to "Exactly" and adjust the "At" values
Cell Size
From Table Properties>Options in the Table tab, check off "Automatically resize to fit contents".
Layout
- Tables copied and pasted from other applications may have a corrupted layout when output. If the copied layout is corrupted, create a new table in the template file.
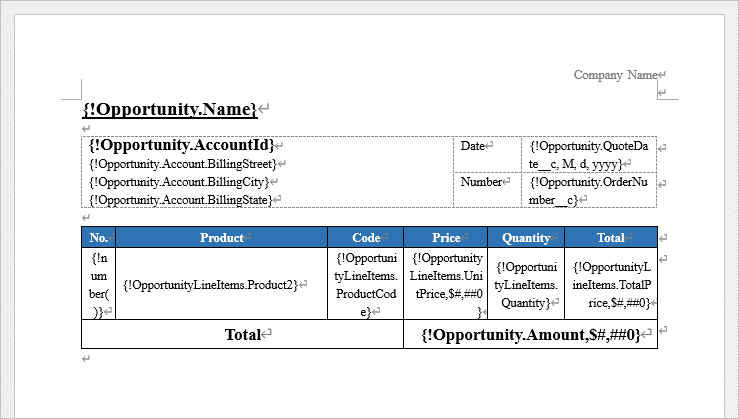
- For different layouts on the left and right sides, create a single table and set it up by dividing cells and displaying/hiding table borders. Tables cannot be aligned left to right, nor can text be displayed next to a table.
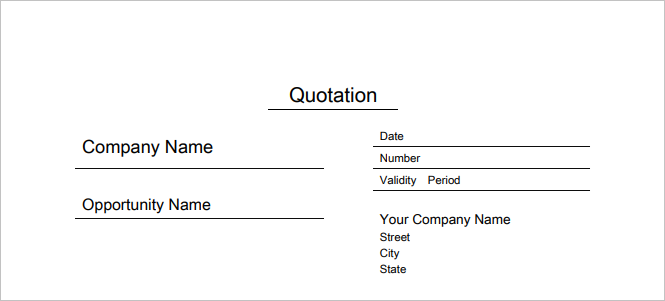
Layout example (cell division, borders display/non-display)
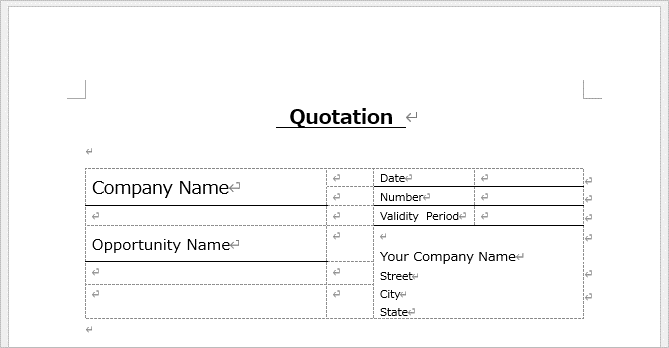
Output
Striped Layout
To stripe a table of child objects, enter two child object rows. For example, if the first line has a blue background and the second line has a white background, odd-numbered lines are output with a blue background and even-numbered lines with a white background. Alternatively, set the format from the table design.
Font
Only the following four PDF fonts can be used for PDF output. If other fonts are used in the Word template file, it will be output in the font set in the "PDF default font" in the OFC_Template record. When using double-byte characters such as Japanese, only Arial Unicode MS fonts can be output.
| Word Font | PDF Font |
| Arial | Arial Unicode MS |
| Microsoft Sans Serif
Tahoma Helvetica |
Helvetica(sans-serif) |
| Times New Roman
Times Century |
Times(serif) |
| Courier New
Courier Monospace |
Courier(Monospace) |
Images (company logo, seal, etc.)
Template files can include images such as company logos. Considerations for images are below.
Objects not supported
Objects such as shapes and text boxes are not supported. Objects may not be output, the background color may not be output correctly, or output may take a long time. Right-click on the object and select "Save as Picture" to save it as an image and replace the object with an image.
Image over text not supported
It is not possible to output an image over text. Follow the steps below to set the text + image capture image to the template.
- Save the Word template file as a PDF manually.
- Open the PDF, enlarge the target text and image to 200-400%, and save the screen capture as an image.
- Insert the image into the template.
*When taking a screen capture, enlarge the text and image because they are blurred at full size. However, if the image size is too large, an output error will occur. Adjust the magnification ratio accordingly.
Office Features
Available Office Features
Table is available.
*Text Box, Watermark, Shapes, Field Codes, and others are unavailable.
Notes on available Office features
Template Sample
Download Sample Template Files
Limitations
- When outputting PDF, the borders of the table may be cut off from the bottom line of the previous page or the first line of the next page at page break.
- Word field codes are not supported.
- Blank spaces with tabs in Word are not supported.
- Tables copied and pasted from other applications may have a corrupted layout when output. If the copied layout is corrupted, create a new table in the template file.
- Tables cannot be aligned left to right, nor can text be displayed next to a table. For different layouts on the left and right sides, create a single table and set it up by dividing cells and displaying/hiding table borders.
- Arial Unicode MS doesn’t support bold or italic font-weight.
- External characters are not supported.
- Watermarks in Word are not supported.
- Objects such as shapes and text boxes are not supported.
- Images cannot be output over text. Save the Word template file as a PDF manually, then enlarge the target text and image to 200-400% and save a screen capture. Set the image to the template.
- The output direction of the image will be the original orientation of the image. The rotation direction in the Exif information of the image will not be reflected.
Reference
Generate a PDF file in Salesforce using Office File Creator
Troubleshooting
- Too much space between lines in PDF.
- A one-page template is output as a two-page PDF.
- The blank page is output in PDF.
- The layout is corrupted in PDF.
- Extra borders of the table are displayed in PDF.
- The borders of the table are not displayed.
- The borders of the table are broken at page breaks in PDF.
- In Acrobat, the thickness of table borders is not displayed uniformly in PDF.
- The row height of the table is low in PDF.
- The text in the table is not centered (vertically) or bottom-aligned in PDF.
- Merge fields in the table are not wrapped and the columns extend horizontally.
- The text is misaligned in PDF
- The image overlaid on the text is outputted out of alignment in PDF.
- The company logo image is not output in PDF.
- The portrait-oriented image is output as landscape in the PDF.
- Text Boxes and Shapes are not output in PDF.
- Watermarks are not output in PDF.
- Double-byte characters are not output in PDF.
- "An internal server error has occurred" is displayed.
- "common.apex.runtime.impl.ExecutionException" is displayed.